Tuesday, January 31, 2012

Sweet Jonah Sits!


There's mama's sweet boy sitting up today at his physical therapy appointment.  I cried.  I'm so proud of this little guy!  :-)

He flirted with every patient and PT in Graves Gilbert today.  Jonah really has a gift of coming in and taking control of a room in a way that his Daddy and I don't completely understand.  


Do not be anxious about anything, but in everything, by prayer and petition, with thanksgiving, present your requests to God.  Philippians 4:6

Monday, January 30, 2012

Taco Flowers! (AKA Taco Cupcakes)

I love cooking with my family.  Yesterday was a cooking with the family kind of day.  I'd seen the taco cupcakes recipe from Gabrielle's Blog, Just Us & Many Miles Traveled, on pinterest and thought.  I'd like to try that!   I'd never seen such a pretty taco.   When they are done they look like little flowers.

I modified the recipe a bit just to match what we had on hand.


Here's what you need:

Lean Hamburger Meat (I used about 1 & 1/2 Pounds)
1 Can Black Beans
Egg Roll Wrappers (2 Wrappers per large cupcake and 1 wrapper per small cupcake)
Sharp Cheddar Cheese (We used one small block.)
Cheese Whiz (Although, I may leave this out next time.  I'm not a huge fan of this but Daniel & Elijah like it.)
Taco Seasoning (We made our own from Chili Powder, Onion Powder, Cumin, Salt, & Garlic Powder)
Salsa


Here's how you make it:


This recipe called for browning the meat with the taco seasoning. I usually put it in after the meat is browned. I think either way will work.  I used about 2 tablespoons.  But feel free to use as much or as little as you like.  


While the meat is browning have your little super hero grate the sharp cheddar.  We did used one of the smaller bricks but use as much or as little as you like.  Take the time to grate your own cheese, it makes it taste sooo much better.  :)


If you used a fattier meat, you'll want to strain the grease before you add the beans.  Strain the can of black beans and add them to the browned meat.  


Okay, so cooking with the family is the best... but not the best for food blogging.  Sometimes we get to talking and I forget to take photos of each step... So, here are a couple of steps with one pic.  
1.  Spray cupcake pan (I used the larger cupcake pan but use what ever you have.) with cooking spray and put one egg roll wrapper in each section.  Leave a little sticking up as this will make the outer pretty shell of the taco.
2.  Put about a table spoon of cheese whizz in the bottom of the egg roll.  If you don't want to use cheese whizz, I understand.  Just sprinkle in some cheddar cheese.  


Oops... No use crying over spilt cheese.  If this happens to you... Do what we did.  Grate more cheese. If not, feel free to skip this step.  


Add in about 2 tablespoons of the meat/beans mixture and 1 teaspoon of salsa.


Now, add some cheese....  :)


Okay, so here is where we got to talking again...
Take another egg roll wrapper and lay it on top of the cheese.  Then press the bottom wrapper and the new one together. You will want to make a tight seal.  Tip:  If the egg roll wrappers start to dry out just moisten them with a bit of water.  
Then you'll repeat the same layering process above ending with cheese.


Bake at 375 for about 15 minutes or until cheese is melted and egg roll is golden brown.  


Mmmmm......


Here's the pretty little taco flower topped with tomato and avocado.  


Saturday, January 28, 2012

RE-purposed Suitcase for my RE-pet!


What do you get when you add....


1 Old Pillow + 1 Old Pillow Case


+


1 Vintage Suitcase?  


A new bed for MOLLEY CHOPS!  :)


Molley's our RE-pet from the Warren County Humane Society  living in her forever home since 2003. She's always a little anxious about new things and was very unsure about her new bed.  Since I took these photos she has been sleeping in it all night long!  (I'll post some updated pics soon; so you can see her not looking so worried.)


Elijah loved it form the beginning.  In this pic he is insisting it is a bed built for two.  

HERE is where I found the idea.  They even put legs on their suitcase but I'm not that handy.  :)  

Strawberry Sticky Buns


My mom always made the best breakfasts on the weekends.   And naturally I wanna be like my mama!  Sometimes...  I get tired of doing the same thing... bacon, biscuits, eggs, cinnamon rolls.  We could almost make a mathematical sequence (or pattern) out of our eating habits.  So, I've been trying to find EASY ways to mix things up a bit.  Like everyone else I've become intrigued by all of the sticky buns/cinnamon rolls/monkey bread- canned biscuit recipes on the internet.  They had me at canned biscuit.  (Someday I'll post a how-not-to make a homemade biscuit recipe. Since that's a bread I just can't seem to master.)

I found a really scrumptious looking orange sticky bun recipe HERE by Hannah at All Things Delicious. But I didn't have anything orange in the fridge.  However, I just bought some really good strawberry preserves.... And I thought I can do something with this.  

Here's my Strawberry Sticky Buns Recipe:
1 can of large flaky biscuits (I used the generic version of Grands Flaky)
1 cup of strawberry preserves or what ever type of preserves you prefer (I just eyeballed this.)
1 stick unsalted butter

That's it!

Grease bundt pan with cooking spray and preheat oven to 350.  


Partially melt butter.  This will make it easier to stir in preserves.  


Stir in preserves.


This is what it will look like when it is all mixed together.  Because my preserves were from the fridge it made a really creamy mixture.  If yours are from the pantry it may not look exactly like this photo.  If you stopped at this point you'd have a really yummy strawberry butter!


Then I microwaved it until the butter was melted again.  


The strawberry goodness will fall to the bottom, so I continued to stir mixture through the remaining steps.  


Toss the the biscuits in the strawberry butter mixture.  


Line biscuits in greased bundt pan like this. Then pour remaining strawberry butter over the top.  


Bake for 20-30 minutes in at 350.  


Okay, so they don't look like much here.... but just wait.  


Don't wait for them to cool.  You'll want to go ahead and turn them onto a platter right away.


Use a knife to lift the bundt pan, otherwise it can be a bit tricky to get off the platter. 


Here's the strawberry sticky buns.  Yummy!!  


Another view!  They were a bit hit at our house.  

Friday, January 27, 2012

Restroom Egocentrism


Egocentrism is defined by some as the inability to see the world outside of their-self.  So, I'd like to coin a new phrase... Restroom Egocentrism.

Hello, I'm Allison and I have restroom egocentrism.
"Hi, Allison."

It has happened to me more than a couple of times.  Here's how it happened today.

I don't know why exactly but eating out for supper on Friday nights is an unwritten rule in our house.  So, we had just entered Culvers.  The baby smelled food and immediately broke out into fits of starvation.  Buzzards were flying around his head.  Daniel took the kids and I took the diaper bag and headed to the restroom to fill his bottle with warm water.  The water bottle we kept in the car was ice cold and my sweet boy doesn't drink cold milk.  I was being a good mommy.

I turned the tap on and waited for what seemed forever for the water to heat.  Finally, warm water.  I filled it up to 6 oz.  Then bent down to be eye level with the counter... always after a precise measurement.  Out of the corner of my eye I see someone walk in.   I glance in the mirror to see who's behind me.  It's a kind man in a ball cap.  He's smiling.  So, of course I smile back and say hello.  I stand and reach for a paper towel to wipe off the excess water.  That's odd.  He's not coming in.  


Oh my gosh.  Finally a light bulb goes off.  There's a man in this bathroom.

Bless his heart.  He's probably humiliated.  


Odd that he's not leaving.  


I finish screwing the cap on the bottle and head for the door.... where the man in still standing.  
He steps to the side to reveal the universal "Men's Restroom" symbol on the door.

My mouth drops open.  "Oh my!!!  I am so so sorry."
He's still smiling.  "No, its fine.  I was just waiting for you to finish.... I was confused."
"I am so sorry.  I do this all of the time."  I try to explain but it only makes things worse.

If this was the first time this had happened, it wouldn't be a weird.  But I do this ALL the TIME.
I definitely have restroom egocentrism.  I mean I have two of the classic characteristics.
1.  I think what ever the first restroom door I see is the restroom that I need to be in.  Sign you say?  I don't need no stinking sign.
2.  I ALWAYS think it is someone elses mistake.  CASE & POINT:  I once walked into a bathroom and wondered why in the world they had put urinals in the female restroom.  Stood there for a while and then realized, OMG I'm in the men's restroom... Again.

Sigh... So that is todays confession.  I'm sure I'll have another run in with a men's bathroom in my near future.  

*Myth Busters:  While I have found that most of the time Men's restrooms are infact dirtier than females that is not true for Culvers.  That was one of the cleanest bathrooms I've been in.

Monday, January 23, 2012

Holy Moly, Elijah's Been in School 100 Days!


How in the WORLD is my little super hero over half way through kindergarten?  It doesn't seem possible.  Well, being a teacher I know what a BIG deal the 100th day of school is during the primary grades.  I want Elijah to have a great first experience. So we've been planning this for a while.

 I can sew.  I really can.  I learned at Grandma Stringfield's house wearing a tiny little thimble called my "sew finger".  But... there is no way I am going to sew 100 buttons or ribbons on a t-shirt.  Thankfully Elijah wasn't going for that idea anyway.  I almost had him talked into glueing 100 feathers on a Native American Vest (made from crinkled up paper grocery sack).
BUT
The note his teacher sent home said T-SHIRT; therefore, he was fairly adamant that whatever we did must be on an an actual t-shirt.  I sure they wouldn't have minded the paper vest.  But alas, it was an argument I couldn't win.    

I saw my dreams of a wonderful 100th day of school going up in smoke.  
Then this flew by.


Was it a bird, a plane?  No, It was Elijah in his t-shirt cape.  What did I say "t-shirt cape"?
Ding, Ding, Ding.....  We have a winner.

In my first few weeks on pinterest I found a tutorial on how to create a cape from old t-shirts. (As soon as I find the blog I'll link it in!)   We have made a TON of these t-shirt capes.  I find them laying around everywhere.  Do you have any idea how many secret lairs I have in my house?  You'd be surprised.  Trust me.   

Because Elijah's capes are made from his Daddy old shirts, they are very long.  So on our last trip to Walmart we picked up a tank top that was on the clearance rack.  On that same trip Elijah also decided that sticker glitter stars were a great addition to his cape.  I encouraged this because it did not require me threading a needle or ironing 100 times.  

Here's how we made the cape.  


The front of the tank.  This will be cut off.  So, it doesn't matter what it looks like. 


Here's the back of the tank.  My little super hero picked this one out because he said it looked like the "old batman" on Netflix.  


Cut up one arm-hole towards the neck.  Then cut around the neck.  You want to leave the neck in place so your super hero can slip the cape over his/her head. 


After you cut around the neck (it is flipped up in this picture), cut down the seam of the shirt.  


So, you'll be left with something that looks like this.  Then you just cut down the other seam of the shirt.  


Finally, you'll be left with this.  A cape and a scrap.  

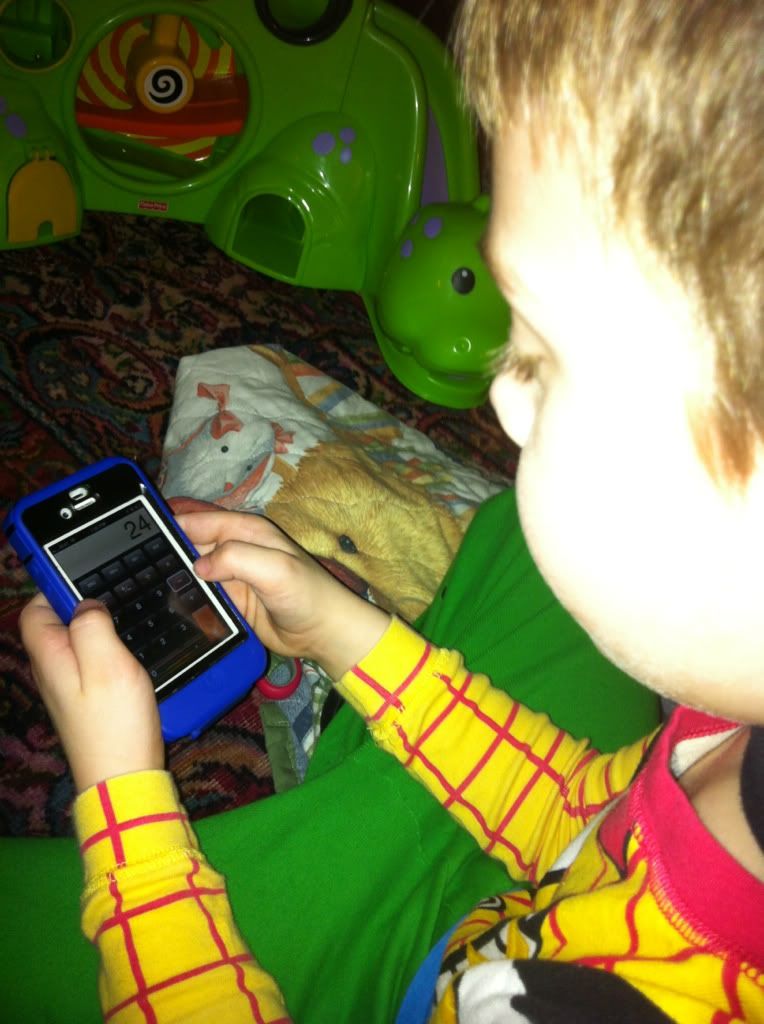
Then my little super hero diligently counted out 100 stars............


Then he checked his counting with a calculator (iPhone).


And put them on his cape.  I suggested an array model of 10 x 10.  Trying to toss a little number sense in there.  He wanted to do abstract random design.  


We went with abstract random.  I think he was right.  It looks more like a super hero.  

There was one problem.  We had a bit of a blank space.  But never fear...  We had a plan.  Remember when I said Elijah chose that cape because it looked like Batman's?  He helped me pick out this image that we printed on Avery's iron transfer paper and ironed onto his cape. 


Holy Moly, Elijah!  You've been in school 100 days!

*Two quick notes about image transfer... Be sure to reverse the image (I did this in powerpoint) and take all of the water out of the iron out before you try to iron the image on.  

More pics of the happy super hero!  


Whew.... I don't know about you but I'm worn out.